Step-by-step guide to setting up the Chart of Accounts in Xero
-
Navigate to Chart of Accounts
- Log in to your Xero account.
- Go to Accounting > Advanced > Chart of Accounts.
- You’ll see Xero’s default chart already created for your organization.
-
Review the Default Accounts
- Xero provides accounts grouped under Assets, Liabilities, Equity, Revenue, and Expenses.
- Check if these accounts match your business needs.
- Delete (if unused), rename, or archive unnecessary accounts (note: some system accounts can’t be deleted).
-
Add a New Account
- Click “Add Account”.
- Choose Account Type (e.g., Current Asset, Revenue, Expense).
- Enter Code (a unique number, e.g., 200 for Sales, 500 for Rent Expense).
- Enter Name (e.g., Office Rent, Loan Payable).
- Add a Description (optional but helpful).
- Select Tax Setting (e.g., VAT 20%, GST, No Tax).
- Save.
-
Import a Chart of Accounts (Optional)
- If migrating from another software:
- Go to Import > Chart of Accounts.
- Download Xero’s CSV template.
- Fill in your accounts with codes, names, types, and tax rates.
- Upload the file to Xero.
- If migrating from another software:
-
Organize and Customize
- Group accounts logically (e.g., group all revenue streams under 200–299).
- Keep expense accounts detailed enough for tracking (e.g., separate utilities, rent, salaries).
- Archive accounts you don’t need instead of deleting, so past data stays intact.
-
Assign Tracking Categories (Optional)
- If you want to track by departments, locations, or projects:
- Go to Accounting > Advanced > Tracking categories.
- Create categories like “Branch,” “Region,” or “Project.”
- Apply them when recording transactions.
- If you want to track by departments, locations, or projects:
-
7Verify with Your Accountant
- Before finalizing, confirm your chart matches compliance and reporting standards (GAAP, IFRS, or local rules).
- Ensure codes align with tax reporting.
When you move beyond just adding accounts in Xero, the Chart of Accounts (COA) can be customized with advanced features to make reporting, compliance, and automation much stronger. Here’s a breakdown:
Advanced Features of Setting Up the Chart of Accounts in Xero
Structured Numbering System
- Use account codes that group logically (100–199 = Assets, 200–299 = Liabilities, etc.).
- Leave gaps (e.g., 110, 120, 130) to allow future accounts without renumbering.
- Enables faster coding and easier reporting.
Account Grouping for Reporting
- Create account groups under Profit & Loss and Balance Sheet.
- Example:
- Group “Travel, Meals, and Entertainment” under “Operating Expenses.”
- Group “Short-term Loans” and “Overdraft” under “Current Liabilities.”
- Makes management reports cleaner and easier to interpret.
Assigning Default Tax Rates
- Apply default GST/VAT/Sales Tax rates to accounts.
- Ensures consistency and reduces human error during data entry.
Locking System Accounts
- Certain accounts (like Accounts Receivable, Accounts Payable, Bank) are system accounts.
- These can’t be deleted but can be renamed for clarity.
- Helps align with business terminology (e.g., rename “Trade Debtors” to “Accounts Receivable”).
Default Account Assignments
- Assign specific accounts as defaults for transactions:
- Sales (default revenue account)
- Purchases (default COGS account)
- Payroll Clearing (default for wages & salaries).
- Saves time and avoids misposting.
Multi-Currency Integration
- If multi-currency is enabled, accounts can be set to accept transactions in different currencies.
- Exchange gains/losses are automatically posted to system accounts.
Linking Accounts to Tracking Categories
- While creating transactions, assign tracking categories (e.g., Department, Project, Location).
- When used with the COA, this gives segmented P&L and Balance Sheet reporting.
Custom Reporting Layouts
- Map accounts into custom P&L or Balance Sheet templates.
- Create additional subtotals (e.g., Gross Profit, EBITDA).
- Save layouts for management reporting or board packs.
Importing & Exporting COA
- Import COA in bulk via CSV (useful when migrating from QuickBooks, Sage, MYOB).
- Export for review, compliance checks, or external reporting systems.
Archiving Accounts
- Instead of deleting, archive unused accounts.
- Keeps history intact while keeping the COA clean.
Mapping for Consolidations
- If using consolidation tools (e.g., Fathom, Spotlight, Joiin), set up a COA structure that maps easily across multiple entities.
- Standardize codes across businesses for multi-entity reporting.
Integration with Budgeting & Forecasting
- Assign budget figures to accounts.
- Compare actual vs. budget at the account level in reports.
- Enables advanced forecasting when paired with add-ons.
Tip: A well-structured COA is not just about bookkeeping—it’s the foundation for management reporting, tax compliance, and decision-making.
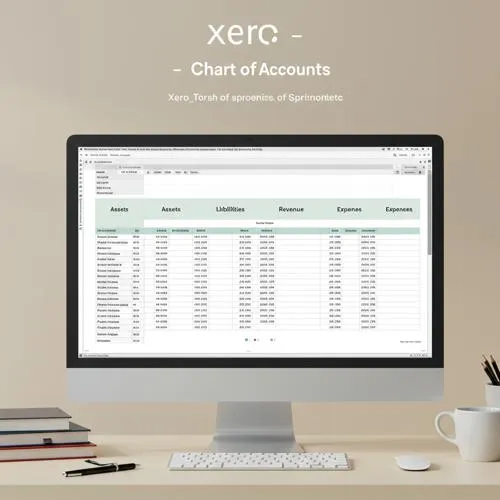
Table of content
- Step-by-step guide to setting up the Chart of Accounts in Xero
- **Advanced Features of Setting Up the Chart of Accounts in Xero**
- **Structured Numbering System**
- **Account Grouping for Reporting**
- **Assigning Default Tax Rates**
- **Locking System Accounts**
- **Default Account Assignments**
- **Multi-Currency Integration**
- **Linking Accounts to Tracking Categories**
- **Custom Reporting Layouts**
- **Importing & Exporting COA**
- **Archiving Accounts**
- **Mapping for Consolidations**
- **Integration with Budgeting & Forecasting**